Important notice:
Please remove the installer script after finishing the installation. It is a security risk to have the installer on a global accessible site! You can achieve this by removing the install.php script or by making it unaccessible for the user running the web server.
The installer is started by entering the following URL into your web browser presuming that you have the alias names as mentioned above. Otherwise please use the values fitting your installation:
http(s)://localhost/svnaccessmanager/install/install.php
It is recommended to use https to access the installer over the internet because of the fact that passwords are sent to the web server!
Installer first page
After the installer is started, please fill in the values fitting your requirements. Below you find a short description of the several settings. The installer consists of six pages. After you finished filling the appropriate values click Start installation. If there are errors please correct them. Otherwise the installer starts and gives you a success information. Additional the web server configuration is printed out.
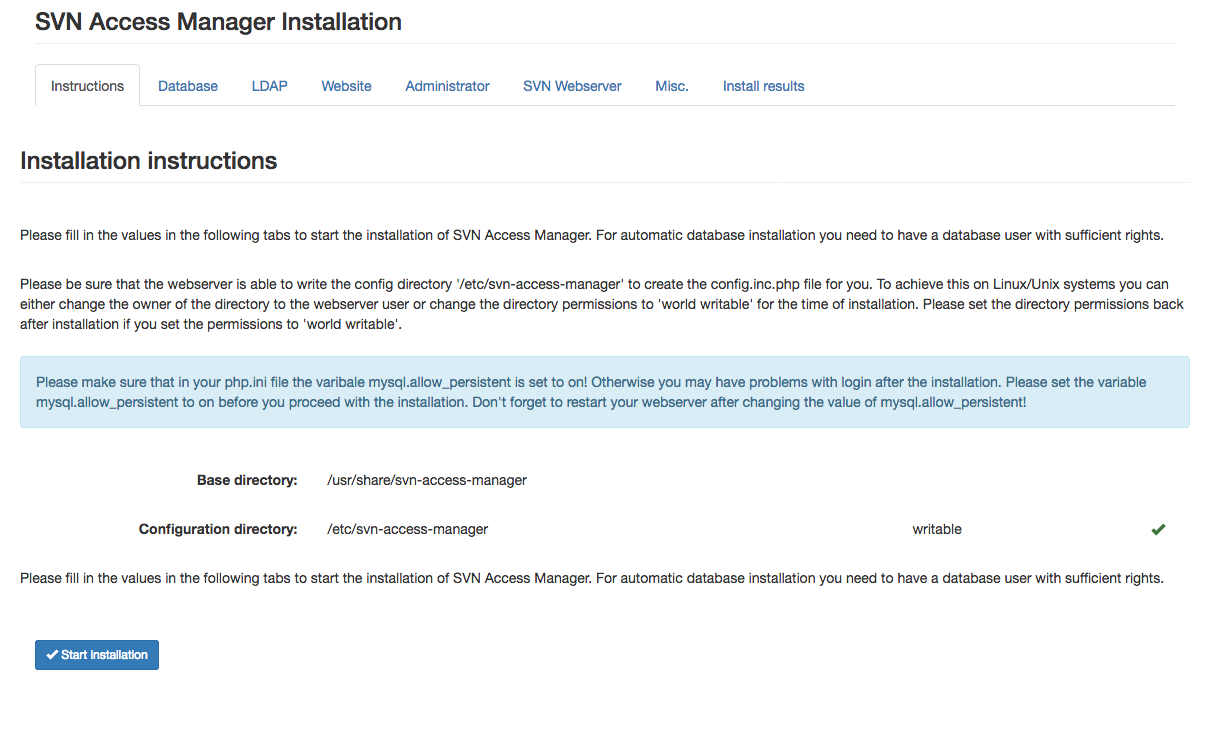
Instructions
The installation instructions inform you about the installation process and about of missing settings in the php.ini file. Please make sure that thewebserver running the installer script is able to write the configuration file to disk.
Database settings
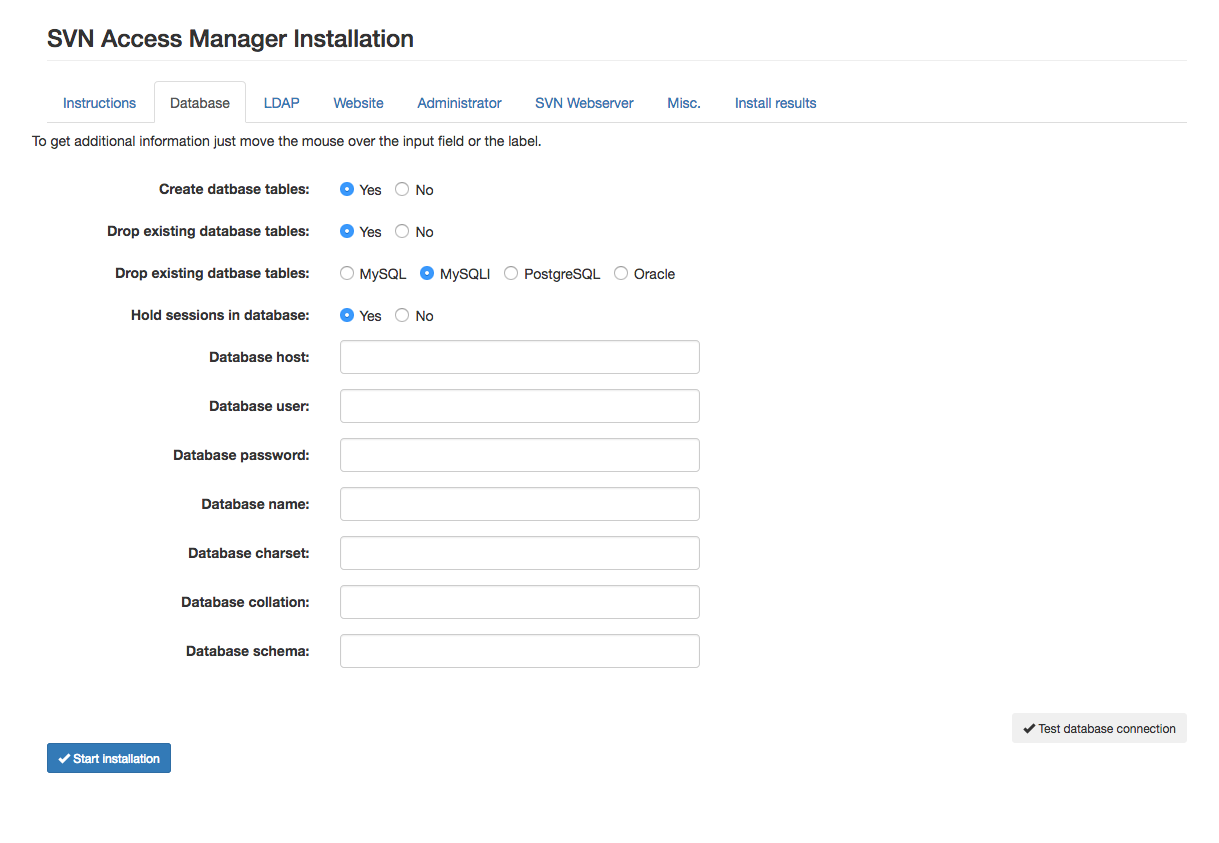
Database installation
The installer can create the database tables during installation. You can select if you want to drop already existing tables or not. The database user you want to use must have sufficient rights to do this. Please make sure that the user has the rights to create and drop tables and create and drop indices.
SVN Access Manager supports MySQL, PostgeSQL and Oracle databases. Select the database you want to use.
LDAP settings
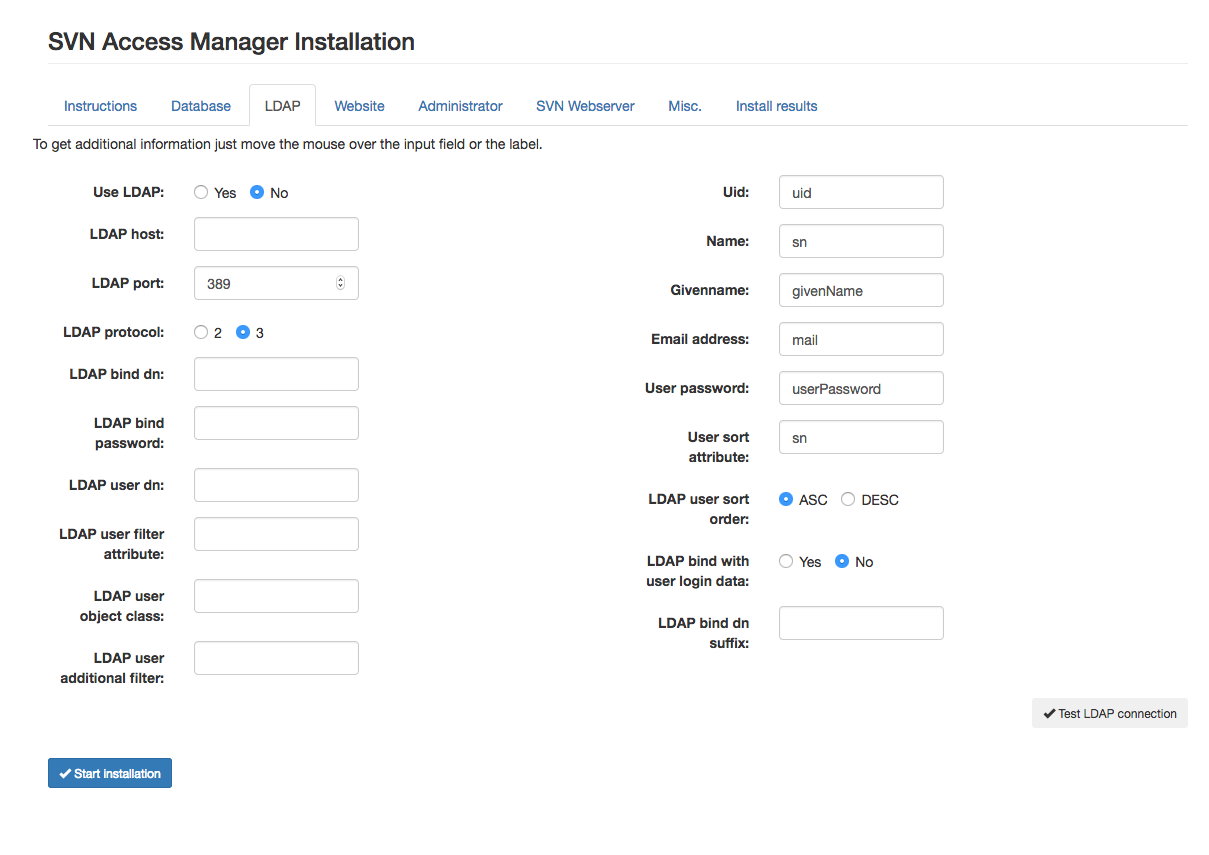
LDAP installation
SVN Access Manager can use an external LDAP directory for authentication of users. Please fill in the values to connect to the LDAP server and specify the attribute mapping if necessray.
You can change the sort order of LDAP users by setting the values for LDAP User sort attribute and LDAP user sort order.
LDAP bind with user login data changes the behaviour for Active Directory users. LDAP bind will be done with the user credentials. If you say ‘Yes’ here you must fill in the LDAP Bind Dn Suffix too.
Using LDAP will change the behaviour of SVN Access Manager. You will not be able to add users with your own uswernames. The users will be fetched from the LDAP directory and you can only add the users to SVN Access Manager to give the users the chance to work with your subversion repository.
Impoartant notice:
The admin user you choose must exist in the LDAP directory you connect to. Otherwise you will not be able to login to SVN Access Manager!
You will have to setup your Webserver to work with LDAP authorization. After installation on the result page a sample configuration for Apache webserver will be shown depending on your input.
Website settings
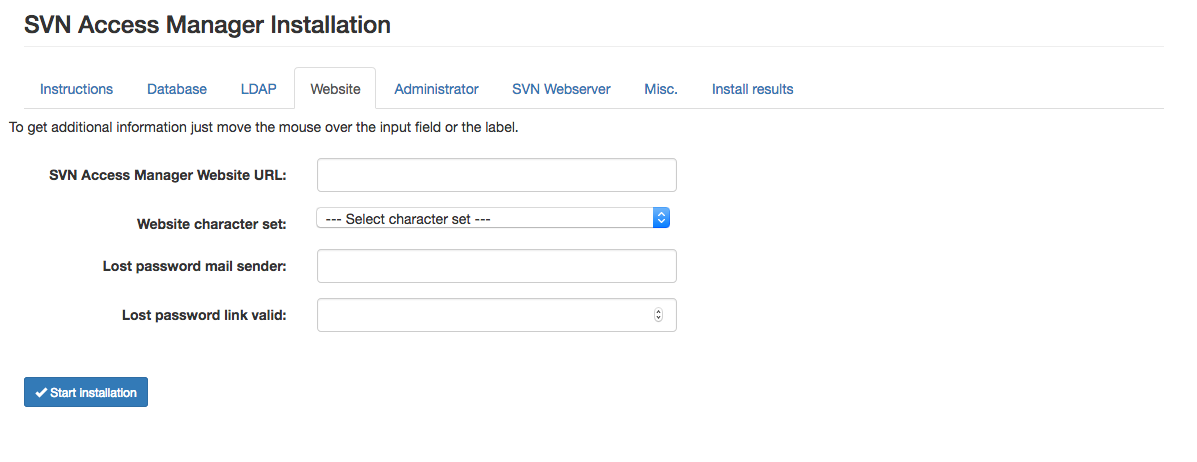
Website installation
On this page you can set the website characterset. This characterset must be compatible with the database characterset. You can also enter the sender for lost password notification mails and the duration a link to reset the password is valid.
Administrator account

Administrator settings
After a successful installation you need a user to administer SVN Access Manager. This user has all rights within SVN Access Manager. So be careful what password you use. By default the password must consist of lower case letters, upper case letters, digits and special characters. It must have 14 characters at least. If the both passwords do not match they are marked accordingly during input.
Webserver settings
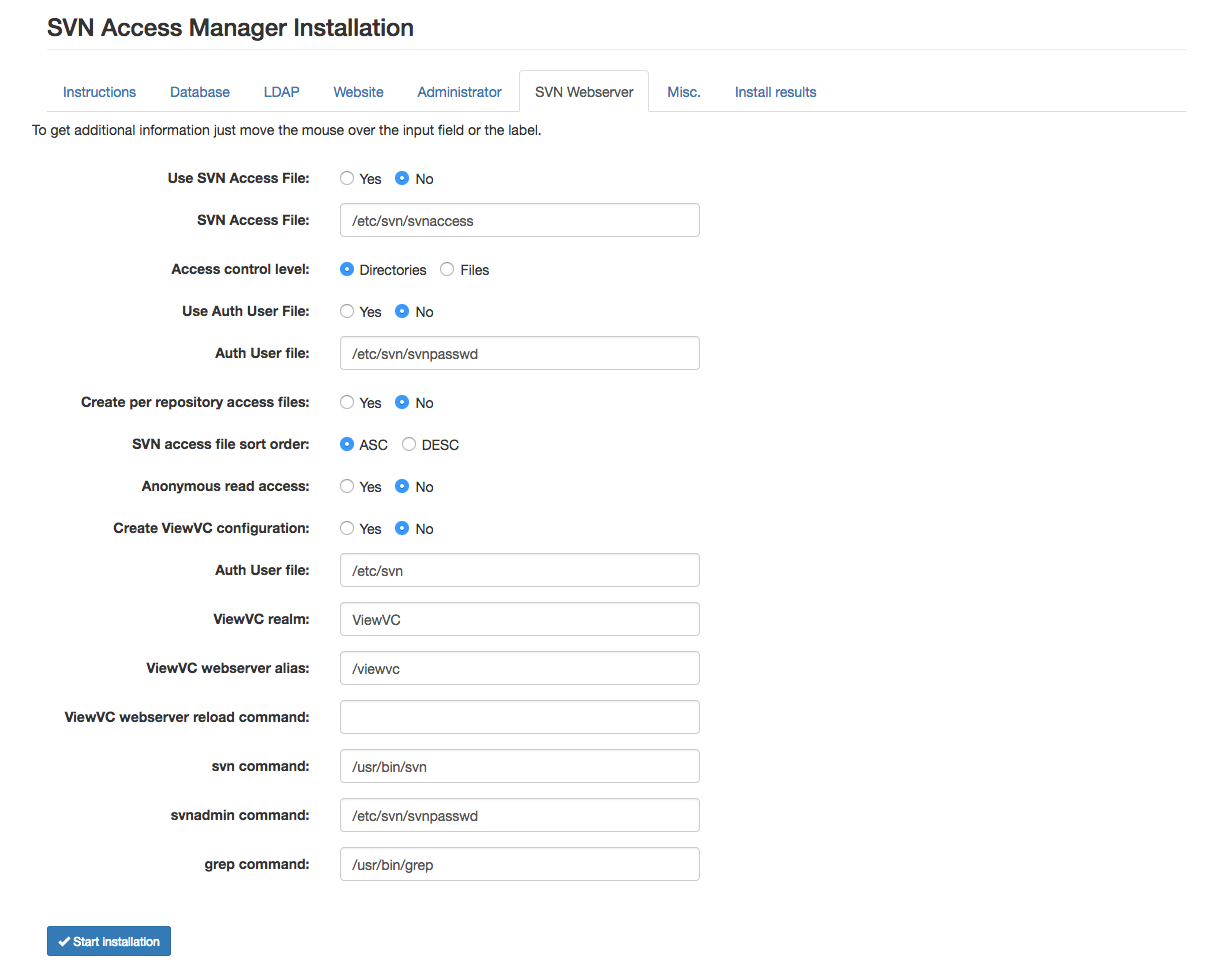
Installer SVN Webserver
In the web server section you can decide whether you want to use SVN access control and Apache user authentication. If you want to use the different restrictions you must specify the filenames where to store the generated files. Please keep in mind that the web server user must be able to write the files!
SVN access file sort order makes it possible to change the sort order of the pathes in the access file.
Anonymous read access creates an entry in the SVN Access File letting anonymous users read a repository.
To use the ViewVC restrictions you must select to create the configuration files, specify the directory where to write the configuration files, enter the alias you use for ViewVC in the web server and give a command which enables the web server to restart itself. You can find detailed explanations about the setup of the ViewVC restrictions here. You can find information about ViewVC on the ViewVC Homepage.
SVN Access Manager makes use of the svn and the grep commands. Please check the installer’s suggestions and correct them if necessary.
Miscellaneous settings
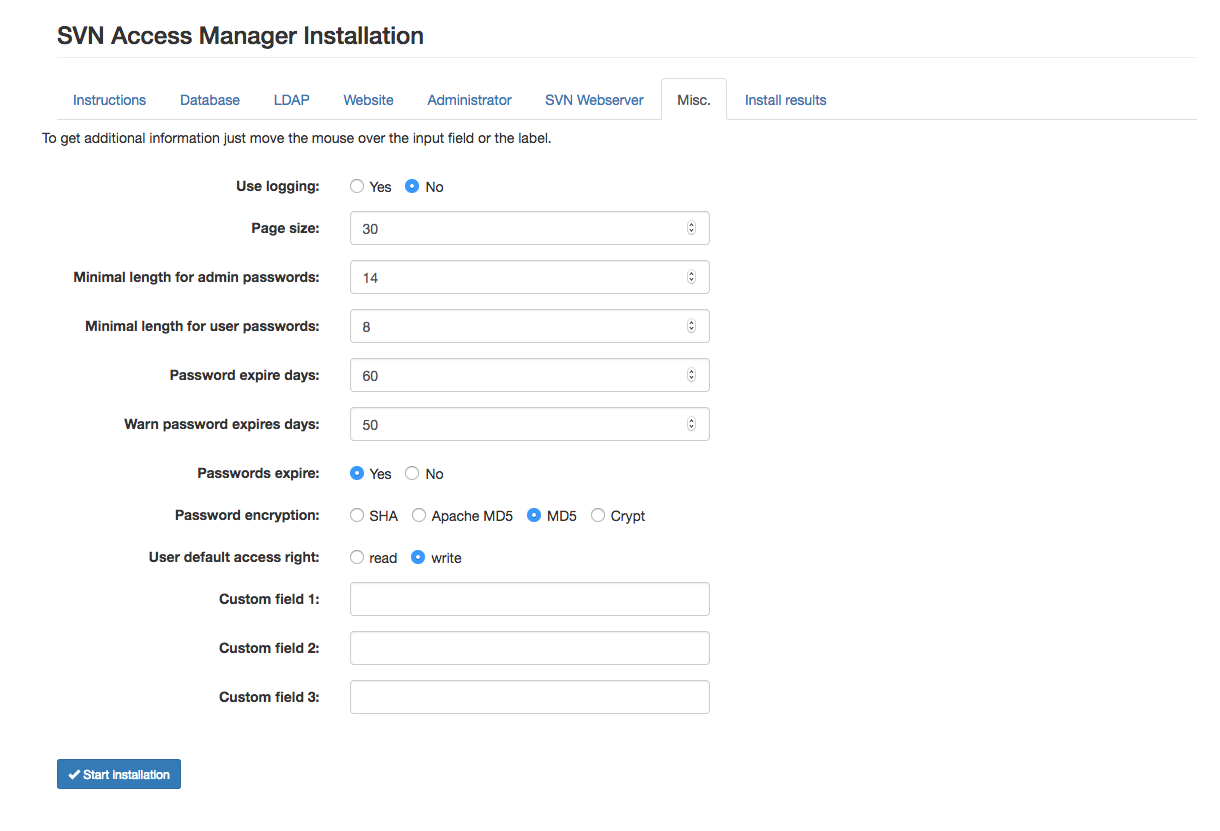
Miscellanious settings
In this section you can decide if you want to use JavaScript or not. JavaScript is needed to make the directory selections easier because you can select a directory the one click.
SVN Access Manager can do logging. Every action will be logged into a database table and a report will be available.
The Page size sets the default value of how many records will be displayed on a screen. This value can be overwritten by the preferences each user can set.
The password length fields set the minimal length for user and administrator passwords. It is strongly recommended to have strong and long enough passwords. Please keep in mind that a repository which has weak user and administrator passwords can easily be accessed by a malicious user.
You can use crypt or md5 to crypt the passwords. You can switch the configutation at every time by changing the setting in the config.inc.php file. The passwords are stored encrypted in the database. Once an user changes his password it will be encrypted with the new algorithm.
The user default access right is the default walue which will be shown during creation of an user.
You can setup up to thee custom fields for users e. g. phone number, fax number. These fields will only show up when you set custom field names here.
Installation errors
Installer results page
This page shows you all errors found during installation. If you do a database connection test or a LDAP connection test the results will be displayed here also. You will be redirected to this tab if necessary.