The menu items described below are only accessible if you have administrative rights. Depending on your rights you might see all or only particular menu items.
Users
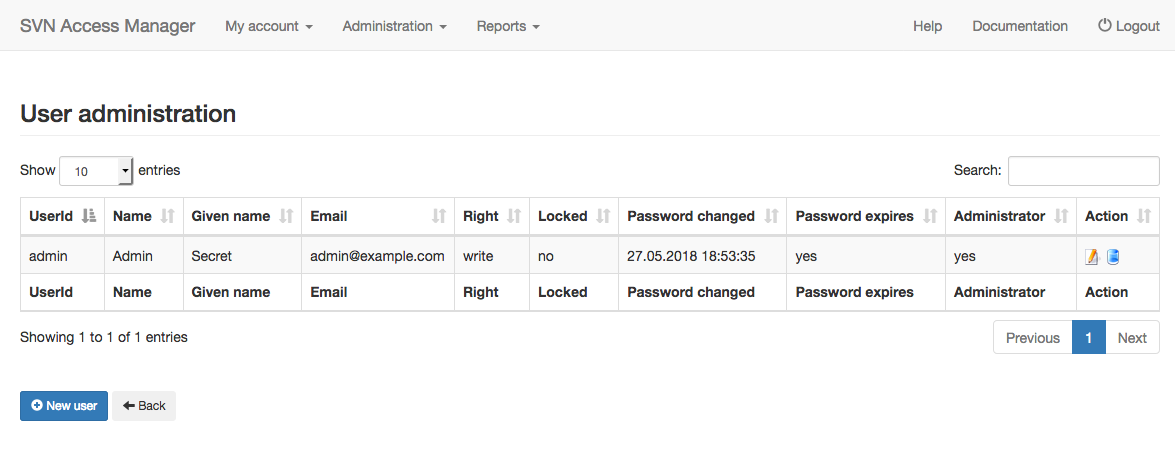
User administration overview
The image on the left shows the user administration overview dialog. You can select an user by clicking on the edit icon on the right of the user, delete an user by clicking on the delete icon on the right of the user or add a new user. If you edit an user or add a new user you will see the user administration dialog shown in the next picture.

User administration, edit user
A user needs a name and a given name, an unique username and a password. The password strength depends on the user’s role. If the user is an administrator the password must be stronger!
Normally passwords expire after 90 days. If you do not want the user’s password to expire you can disable this feature.
The Repository user right determines if a user has write access to repositories. If you specify read here you can not give the user write access to any repository in the defined projects!
The global user rights determine what the user is allowed to do. The right can be none, read, edit or delete. Higher rights also include the lower rights. E. g. the delete right includes edit and read.
If you have been granted subadministration rights you are not allowed to edit all fields of an user. And you are never allowed to grant higher permissions than the pemission your user has. E. g. if your user has the right to add users you will only be allowed to create users with the privilege ‘add’.
With subadministration rights you may be allowed to edit your own user. Be careful in lowering your own rights. You will need an administrator with more rights to give you the rights back!
Groups
Groups are useful to make access right administration easier. You have the possibility to assign rights to whole groups. So adding a member to a group gives the new member all the access rights the group has.
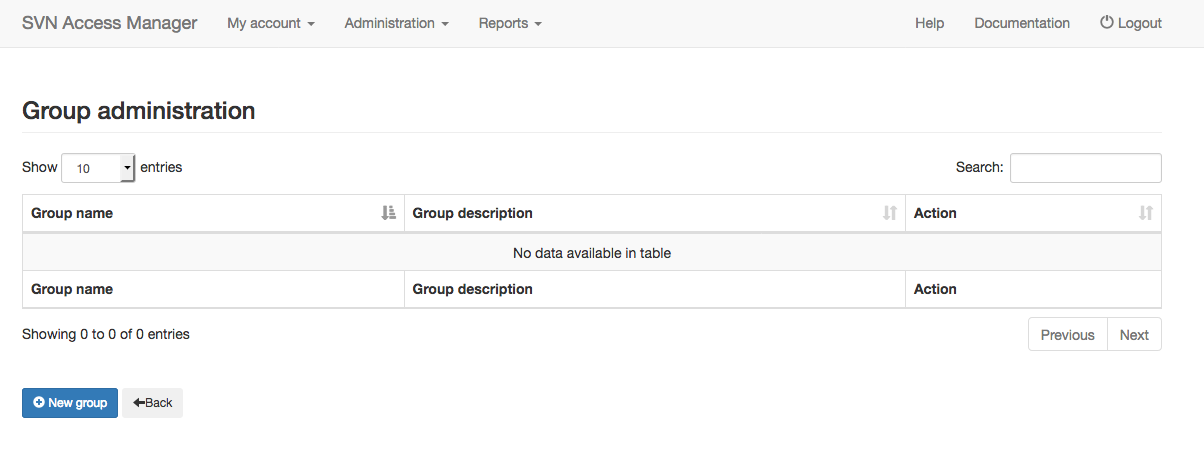
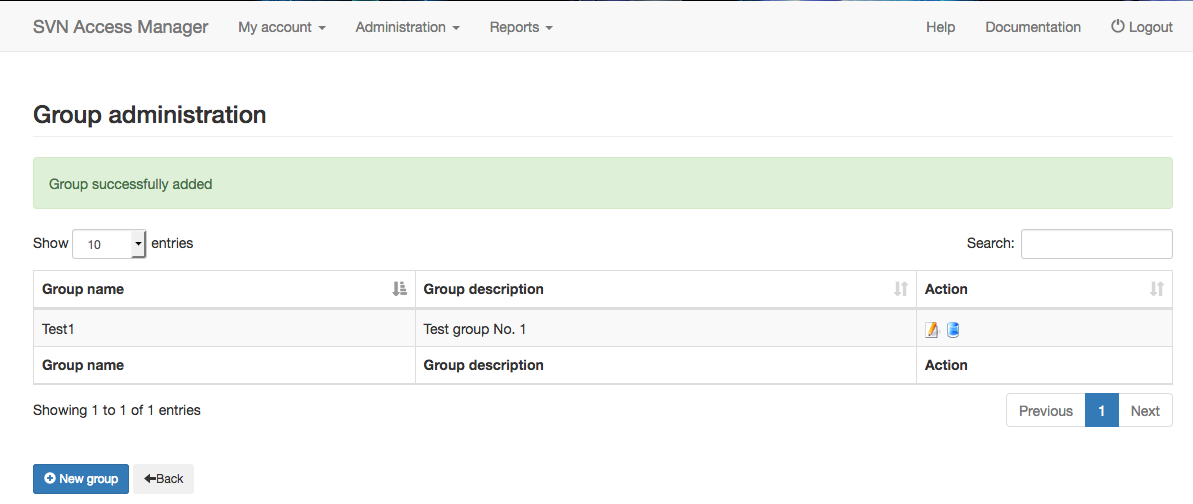
Group administration overview
The image on the left shows the group administration overview dialog. You can select a group by clicking on the edit icon on the right of the group, delete a group by clicking on the delete icon on the right of the group or add a new group. If you edit a group or add a new group you will see the group administration dialogs shown in the next pictures.
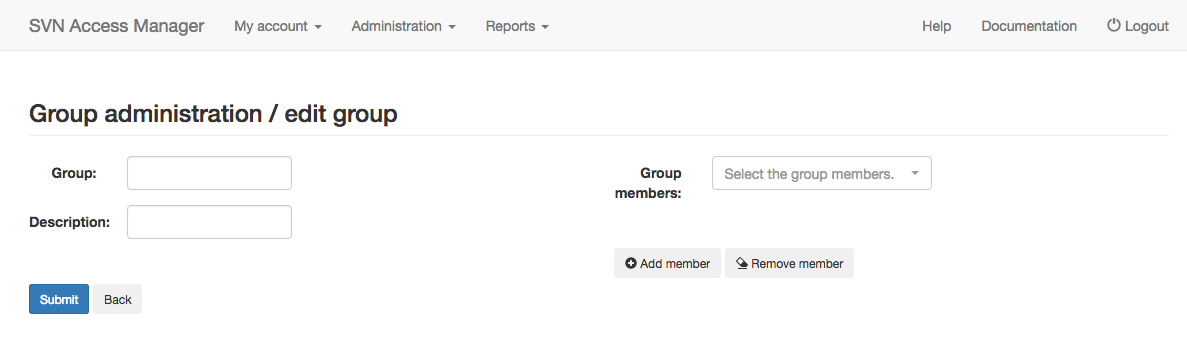
Group administration edit group
This is the group administration dialog. Each group must have a unique group name and a description. If you want to add members to the group you can click on the little green plus sign below group members. In this case you see the following dialog.
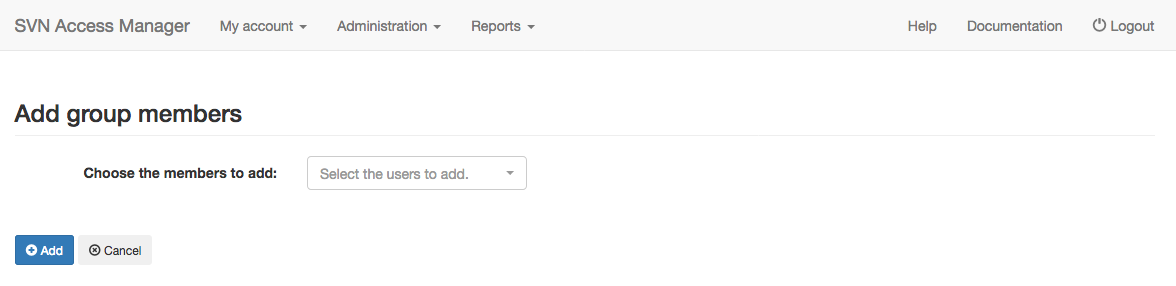
Add group members
Select the members you want to add to the group and click the green hook. This takes you back to the previous dialog.
Group administration overview
After you’re finished you can click the green hook to submit your changes.
Repositories
Here you define the repositories you want to administer. Please keep in mind that removing a repository removes it only from the database.
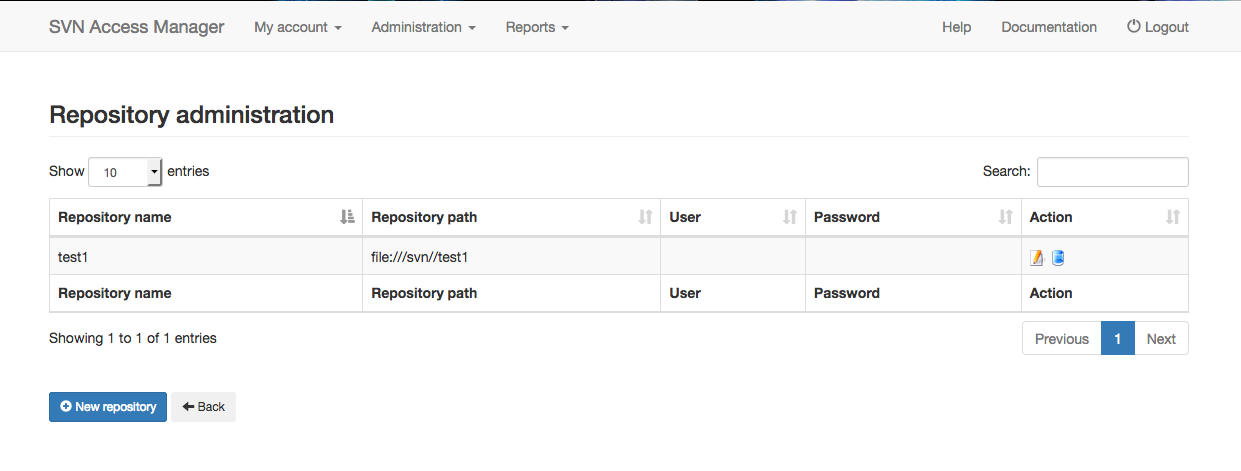
Repository administration overview
The picture on the left shows the repository administration overview dialog. You can select a repository by clicking on the edit icon on the right of the repository, delete a repository by clicking on the delete icon on the right of the repository or add a new repository. If you edit a repository or add a new repository you will see the repository administration dialog shown in the next picture.
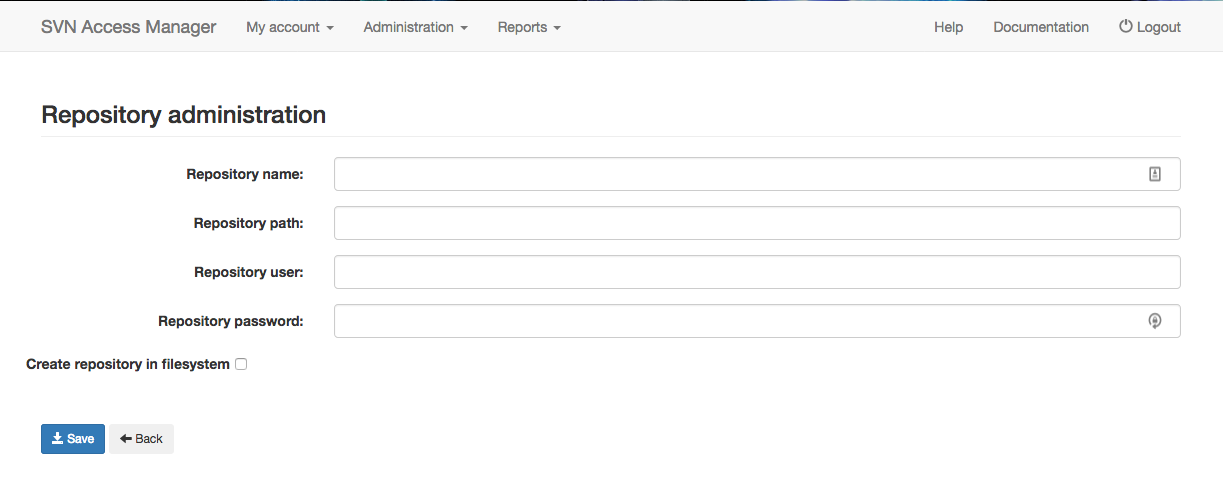
Repository administration, edit repository
Each repository needs an unique name, a repository path and if it is accessed by DAV an username and a password to access the remote repository.
The repository path must start with file:// if SVN Access Manager runs on the same machine as the repository is located.
If SVN Access Manager runs on the same host where the svn repositories are located you can let SVN Access Manager create an empty repository for you.
Depending on your configuration settings you will see the two input fileds for “Auth user file” and “SVN access file”. These fields are for per repository access files. If you do not enter a path and a filename the path from the global configuration is taken and appended with an appropriate filename. Keep in mind that the user running the webserver must have permission to write the files. Otherwise you have trouble with access file generation.
Projects
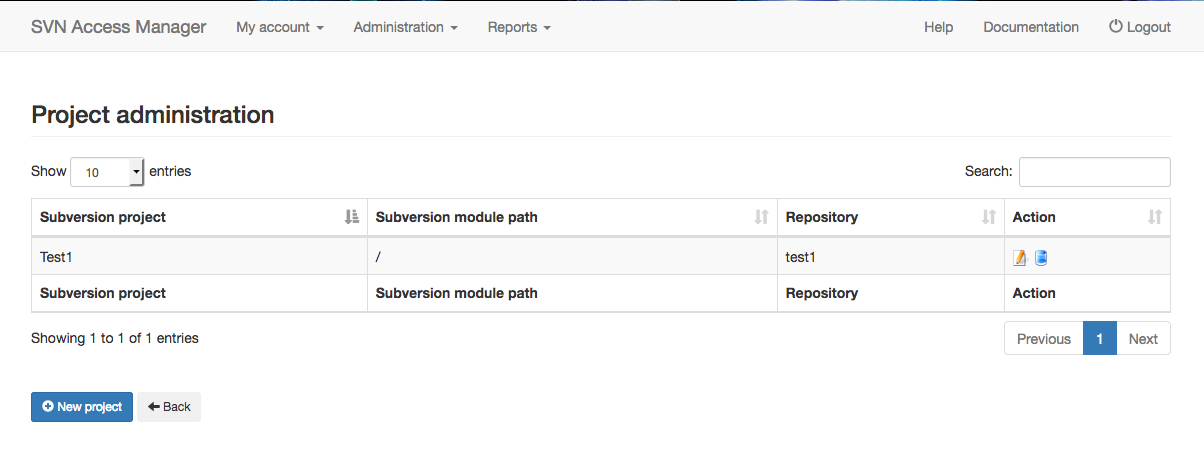
Project administration overview
The picture on the left shows the project administration overview dialog. You can select a project by clicking on the edit icon on the right of the project, delete a project by clicking on the delete icon on the right of the project or add a new project. If you edit a project or add a new project you will see the project administration dialogs shown in the next pictures.

Project administration, edit project
Each subversion project needs an unique name. With the subversion module path you can limit the access to the repository. That means that access right can only be granted to the directory specified here or its subdirectories. The set the top level directory use /.
The project is only valid for one repository. You must choose the appropriate repository from the drop down menu.
To add responsible users for the project click on the green plus sign below Select project responsible users. Doing this you will see the dialog shown in the next picture.
A project needs at least one responsible user. If there’s no responsible user no one can administer the project. Select the users you w3ant to be responsible for the project and click the green hook to return to the previous dialog. It should look similar to the next picture.
After you’re finished you can click the green hook to submit your changes.
Repository access rights
Subversion grants access rights recursively. That means that creating access rights to repositories is not as complex as it seams. Let’s have a small example.
Repository testrepo:

trunk
     /dir1
     /dir2
          /dir3
          /dir4
     /dir5
Let’s assume that there are two user defined for this repository, user A and user B. User A should have read access to the whole repository but should only be allowed to write into “dir2” without the sub directories. User B should have write access to the whole repository except “dir5”. For dir5 he should not have any access.
You can set the access rights with SVN Access Manager according to this created access file:
[testrepo:/trunk/]
A = r
B = rw

[testrepo:/trunk/dir2]
A = rw

[testrepo:/trunk/dir2/dir3]
A =

[testrepo:/trunk/dir2/dir4]
A =

[testrepo:/trunk/dir5]
B =

Repository administration overview
The picture on the left shows the access right administration overview dialog. You can select an access right by clicking on the edit icon on the right of the access right, delete an access right by clicking on the delete icon on the right of the access right or add a new access right. If you edit an access right or add a new access right you will see the access right administration dialogs shown in the next pictures.
First you have to select the project you want to work with.
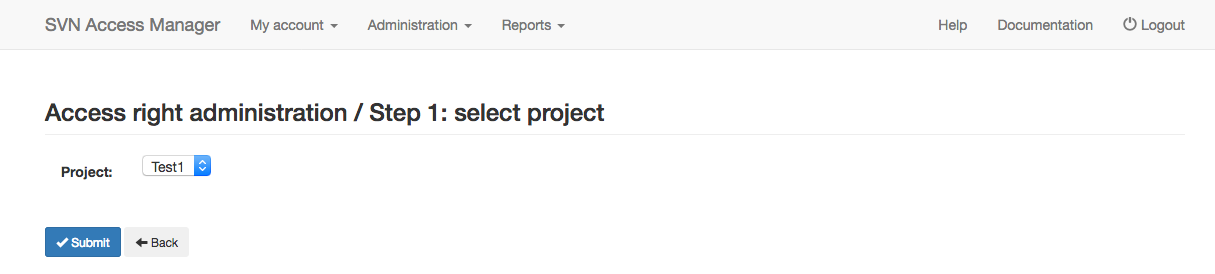
Access right administration, select project
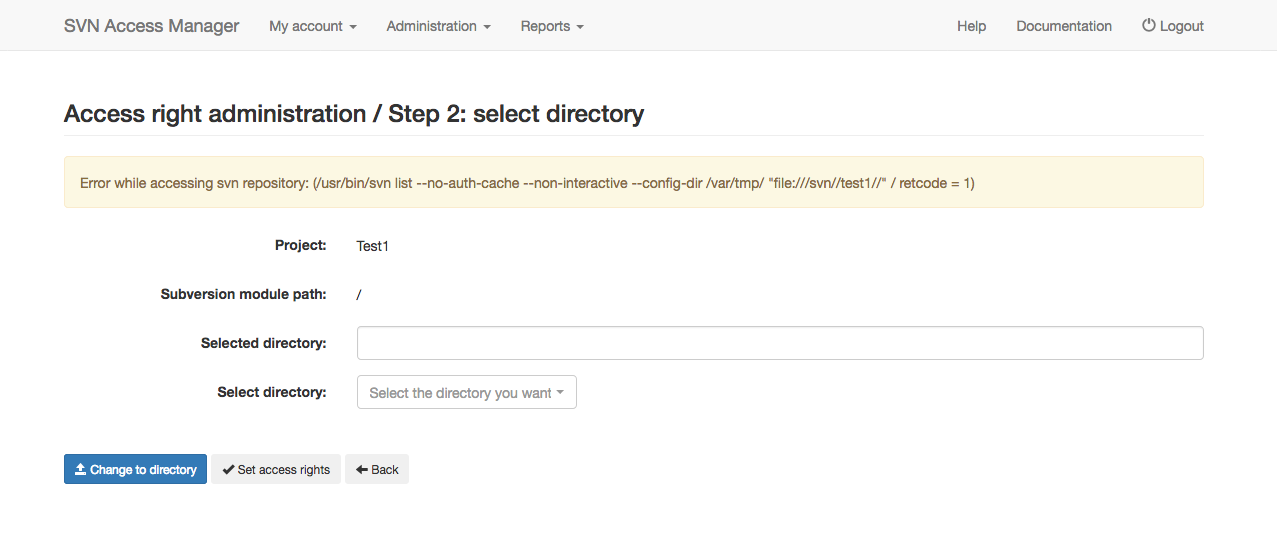
Access right administration, select directory
Now you have to select the directory you want to add rights. If you selected to use JavaScript during installation you only need to click on the directory and it will be selected automatically. Otherwise you have to click on the blue right arrow to change the directory.
In the picture you see a message. In this case you can also enter the directory by hand.
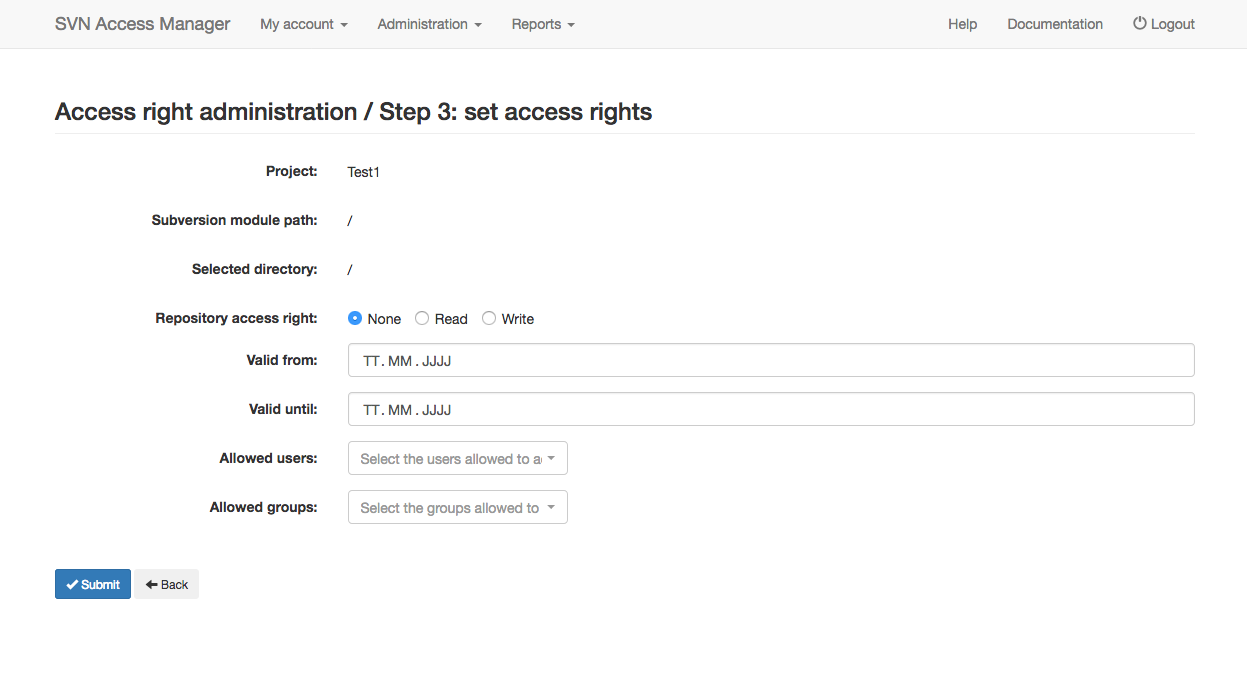
Access right administration, set access right
This step allowes you to set the access rights. You can choose of None, Read and Write. Write access includes read access.
An access right might have only a limited validity. You can specify the valid from and valid until date. In this case the access right is valid only between the both dates.
The access rights can be assigned to user and groups. You can select one or more users and one or more groups at a time. If multiple entries are selected one database entry is created for each selection.
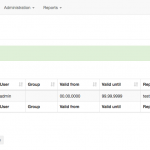
Repository administration overview
After submitting your access rights you will see them in the access right administration overview dialog. If you selected more than one user or group you will see one line for each user/group you selected.
To delete multiple access rights you can mark them on the left side and click to the delete icon below.
Create access files
Create access files
You can create the access files you selected during installation. If you decided not to use any access files this menu item does not show up.
Before the access files are created you must confirm to do so.
Group administrators
Group administration overview
The image on the left shows the group administrators overview dialog. You can select a group administrator by clicking on the edit icon on the right of the group administrator, delete a group administrator by clicking on the delete icon on the right of the group administrator or add a new group administrator. If you edit a group administrator or add a new group administrator you will see the select group dialogshown in the next picture.
Group administration edit group
Select the group you want to add a new group administrator.
After clicking the ok button you will see the dialog shown in the next picture.
Add group members
Select the user you want to grant privileges on the previous selected group. Select the right you want to give to the user.
After klicking the ok button you are finished.
The global user rights determine what the user is allowed to do. The right can be none, read, edit or delete. Higher rights also include the lower rights. E. g. the delete right includes edit and read.
Bulk add LDAP users
The bulk add LDAP users screen shows you all users from your LDAP which are currently not added to the database of SVN Access Manager. All users are shown selected to add them to the database. All users will get the same repository access right which can be set on top of the table.
Message administration
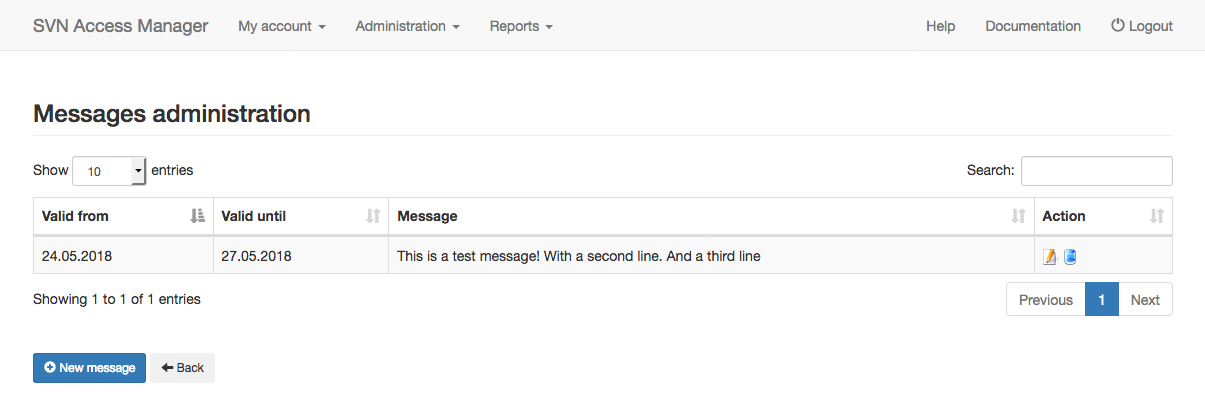
Message administration overview
With the new version 0.6.x.x there’s a possibility to show important messages on the main screen of your
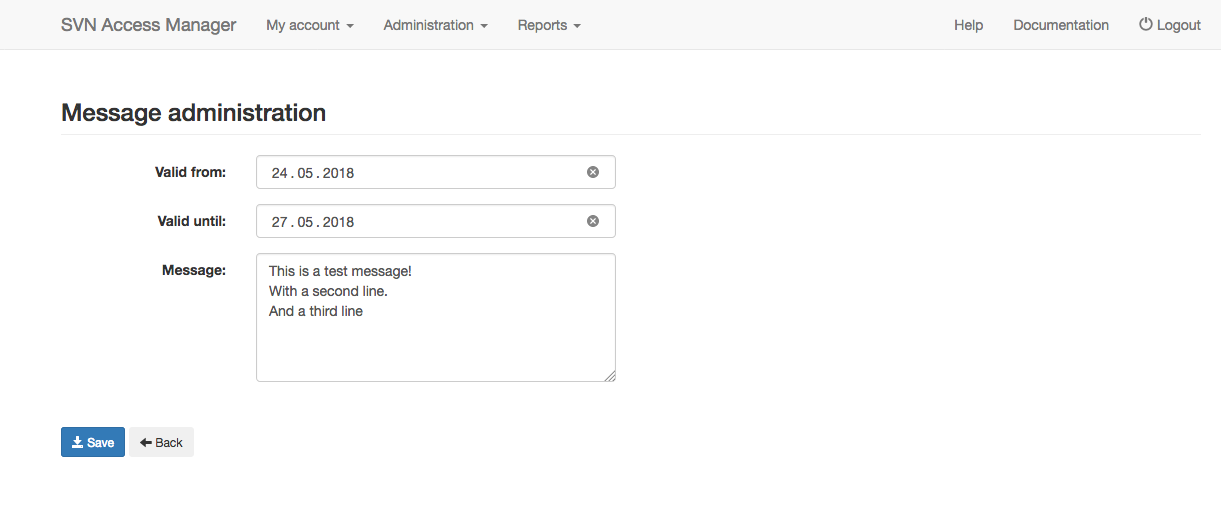
Edit message
users. The messages must have a valid from and a valid until date. During this date range the message will appear on the main screen of every user.
From the overview table you can select existing messages an edit them or delete existing messages. New messages can be added as well.
The picture on the right shows the edi dialog for a message.